Are you a passionate photographer looking to capture the awe-inspiring beauty of the night sky? Look no further, as we have gathered the top tips that every photographer should know to take breathtaking shots of celestial wonders. Whether you’re a beginner or an experienced photographer, mastering the art of night sky photography can be challenging, but immensely rewarding. From selecting the right equipment to understanding the technical aspects, we’ll guide you through the essential techniques that will help you capture stunning images of stars, galaxies, and even the mesmerizing phenomenon of the Northern Lights. Join us on this journey as we unveil secrets to achieving sharp focus, properly exposing your shots, and creatively composing your night sky photographs. Get ready to take your photography skills to new heights and unlock the secrets of the vast cosmos through your lens. Let’s embark on this nocturnal adventure together!
Understanding camera settings for night sky photography
Night sky photography requires a solid understanding of your camera settings to ensure you capture the beauty of the cosmos in all its glory. The first setting to consider is your ISO. For night sky photography, it’s best to use a high ISO setting, typically between 800 and 3200, to capture the faint light from the stars. However, be cautious not to set it too high, as it can introduce unwanted noise into your images.
Next, let’s talk about aperture. A wide aperture, such as f/2.8 or lower, allows more light to enter the camera, enabling you to capture the stars’ brilliance. Keep in mind that using a wide aperture might result in a shallow depth of field, so adjust accordingly if you want to include foreground elements in your composition.
Lastly, pay attention to the shutter speed. The longer the shutter is open, the more light it captures. However, longer exposures can lead to star trails, which may or may not be desired. Experiment with different shutter speeds to achieve your desired effect, and consider using a remote shutter release or the camera’s self-timer to minimize camera shake.
Finding the perfect location for night sky photography
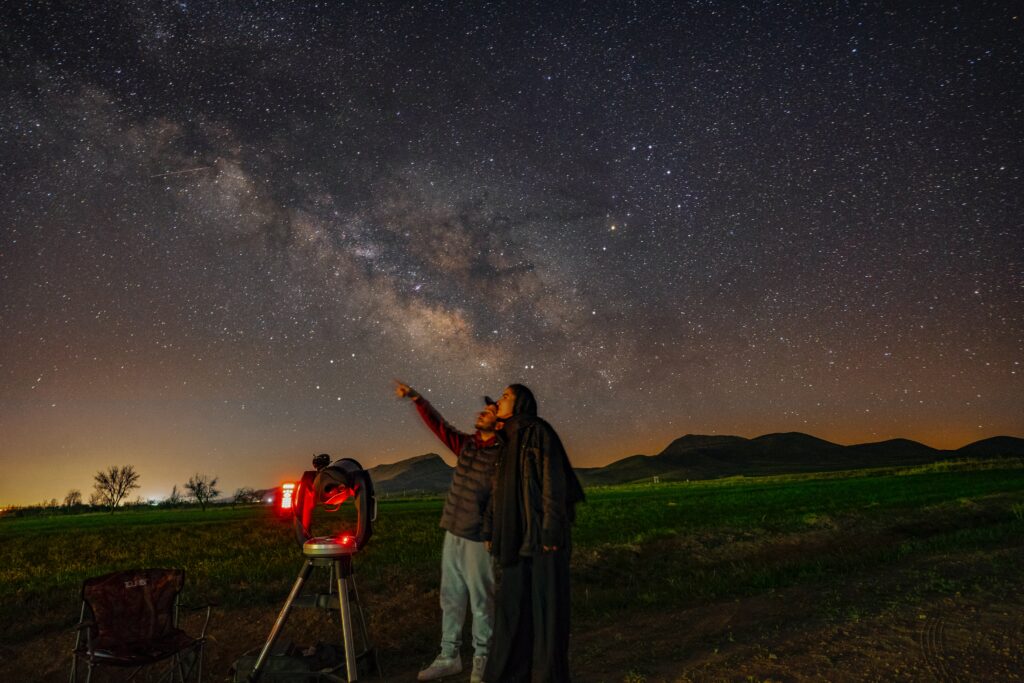
The location you choose for your night sky photography can make all the difference in capturing stunning images. Look for areas with low light pollution to minimize unwanted artificial light in your shots. National parks, remote countryside, or areas with minimal urban development are excellent choices.
Additionally, consider the weather conditions. Clear nights with minimal cloud cover offer the best opportunities for capturing the stars. Utilize weather apps or websites to check for clear skies and plan your night sky photography outings accordingly.
Lastly, scout locations during the day to familiarize yourself with potential compositions and interesting foreground elements. This will save you time and allow you to focus on capturing the night sky once you arrive at your chosen location.
Planning your night sky photography shoot
Planning is key to successful night sky photography. Start by checking the moon phase. A new moon or a crescent moon phase is preferable as it produces less light pollution, allowing the stars to shine brighter. Avoid shooting during a full moon, as its brightness can overpower the stars.
Next, plan your shoot around astronomical events such as meteor showers, eclipses, or the appearance of the Milky Way. These events offer unique opportunities to capture extraordinary night sky photographs. Use online resources or smartphone apps to stay informed about upcoming astronomical events.
Before heading out, prepare your equipment. Charge your camera batteries, clear memory cards, and pack extra batteries and memory cards for extended shooting sessions. A headlamp or flashlight will also come in handy for navigating in the dark.
Tips for capturing sharp and clear night sky photos
Achieving sharp and clear night sky photos requires attention to detail and proper techniques. Here are some tips to help you capture stunning images:
- Focus carefully: Use manual focus and set it to infinity (marked as ∞ on your lens) to ensure the stars are in sharp focus. Test your focus by taking test shots and adjusting as needed.
- Use a remote shutter release: Minimize camera shake by using a remote shutter release or the camera’s self-timer to trigger the shutter. This will help you achieve sharper images.
- Experiment with exposure times: Try different exposure times to capture the desired effect. Longer exposures will result in brighter stars and potentially star trails, while shorter exposures can produce sharper star points.
- Take multiple shots: Capture multiple shots with varying settings to increase your chances of getting the perfect shot. This will also allow you to experiment with different compositions and techniques.
- Check for noise: Review your images for noise, especially in the shadows. Adjusting your camera’s noise reduction settings or applying noise reduction techniques during post-processing can help minimize noise.
Implementing these tips will greatly improve your chances of capturing sharp and clear night sky photos that truly showcase the wonders of the cosmos.
Creative techniques for capturing unique night sky shots
While capturing the stars in all their glory is awe-inspiring, there are also creative techniques you can employ to capture unique and captivating night sky shots. Here are a few techniques to consider:
- Star trails: Instead of freezing the stars in a single image, experiment with longer exposures to capture the rotation of the Earth. This will result in mesmerizing star trails that add a sense of motion to your photographs.
- Foreground elements: Incorporate interesting foreground elements, such as trees, mountains, or landmarks, into your compositions. This adds depth and context to your images, creating a more visually engaging photograph.
- Light painting: Use a flashlight or a small LED light to illuminate foreground elements during a long exposure. This technique can create a dramatic effect and draw attention to specific areas of your composition.
- Silhouettes: Experiment with capturing silhouettes against the night sky. This can be achieved by positioning your subject against the bright horizon or using techniques such as backlighting.
Don’t be afraid to experiment and unleash your creativity when capturing the night sky. The possibilities are endless, and each photograph will be a unique expression of your artistic vision.
Post-processing tips for enhancing night sky photos
Post-processing is an essential part of the night sky photography workflow. Here are some tips to enhance your night sky photos during post-processing:
- Adjust exposure and contrast: Fine-tune the exposure and contrast to bring out the details in the stars and foreground elements. Be careful not to overprocess your images, as this can result in unnatural-looking photos.
- Reduce noise: Apply noise reduction techniques to minimize noise, especially in the shadows. Use caution when applying noise reduction, as it can soften the details in your images if applied excessively.
- Enhance colors: Adjust the saturation and vibrance to enhance the colors present in your night sky photographs. Be mindful of not oversaturating the colors, as this can result in unrealistic-looking images.
- Sharpen carefully: Apply selective sharpening to enhance the details in the stars and foreground elements. Use a light touch when sharpening to avoid introducing artifacts or making the image appear overly sharpened.
Remember that post-processing should enhance your images, not drastically alter them. It’s important to strike a balance between enhancing the natural beauty of the night sky and maintaining a realistic representation of the scene.
Common mistakes to avoid in night sky photography
While venturing into night sky photography, it’s easy to fall into common pitfalls. Here are some mistakes to avoid:
- Not checking the focus: Failing to check the focus during night sky photography can result in blurry images. Always double-check your focus, especially when shooting in low-light conditions.
- Using excessive noise reduction: Applying excessive noise reduction can result in loss of detail and a soft appearance in your images. Use noise reduction sparingly and only where necessary.
- Overexposing the stars: Overexposing the stars can wash out their details and make them appear less vibrant. Pay attention to your exposure and adjust accordingly to retain the beauty of the stars.
- Ignoring composition: Night sky photography is not just about capturing the stars; it’s about creating visually appealing compositions. Don’t forget to consider foreground elements, leading lines, and overall framing to create compelling images.
By avoiding these common mistakes, you’ll be well on your way to capturing stunning night sky photographs.
Conclusion
Congratulations on making it through this comprehensive guide to night sky photography! We hope these tips and techniques have empowered you to embark on your own nocturnal adventure and capture the breathtaking beauty of the night sky. Remember, practice makes perfect, so don’t be discouraged if your first attempts don’t yield the desired results. Keep experimenting, pushing your creative boundaries, and learning from each experience. The night sky is an endless source of inspiration, waiting to be captured through your lens. Happy shooting!